🔍 Contents
-
Activating the Planning View
-
Configuring the Base View
-
Setting Takt Length & Number of Takts
-
T‑Card as the Default Task Type
-
Tips for Optimal Use
🧭 Activate the Planning View
-
Open the desired task board.
-
Click ⚙️ Settings in the top right.
-
Switch to the Planning View tab.
-
Enable the option Show Planning View.
📸 Screenshot: Task Board > Settings > Planning View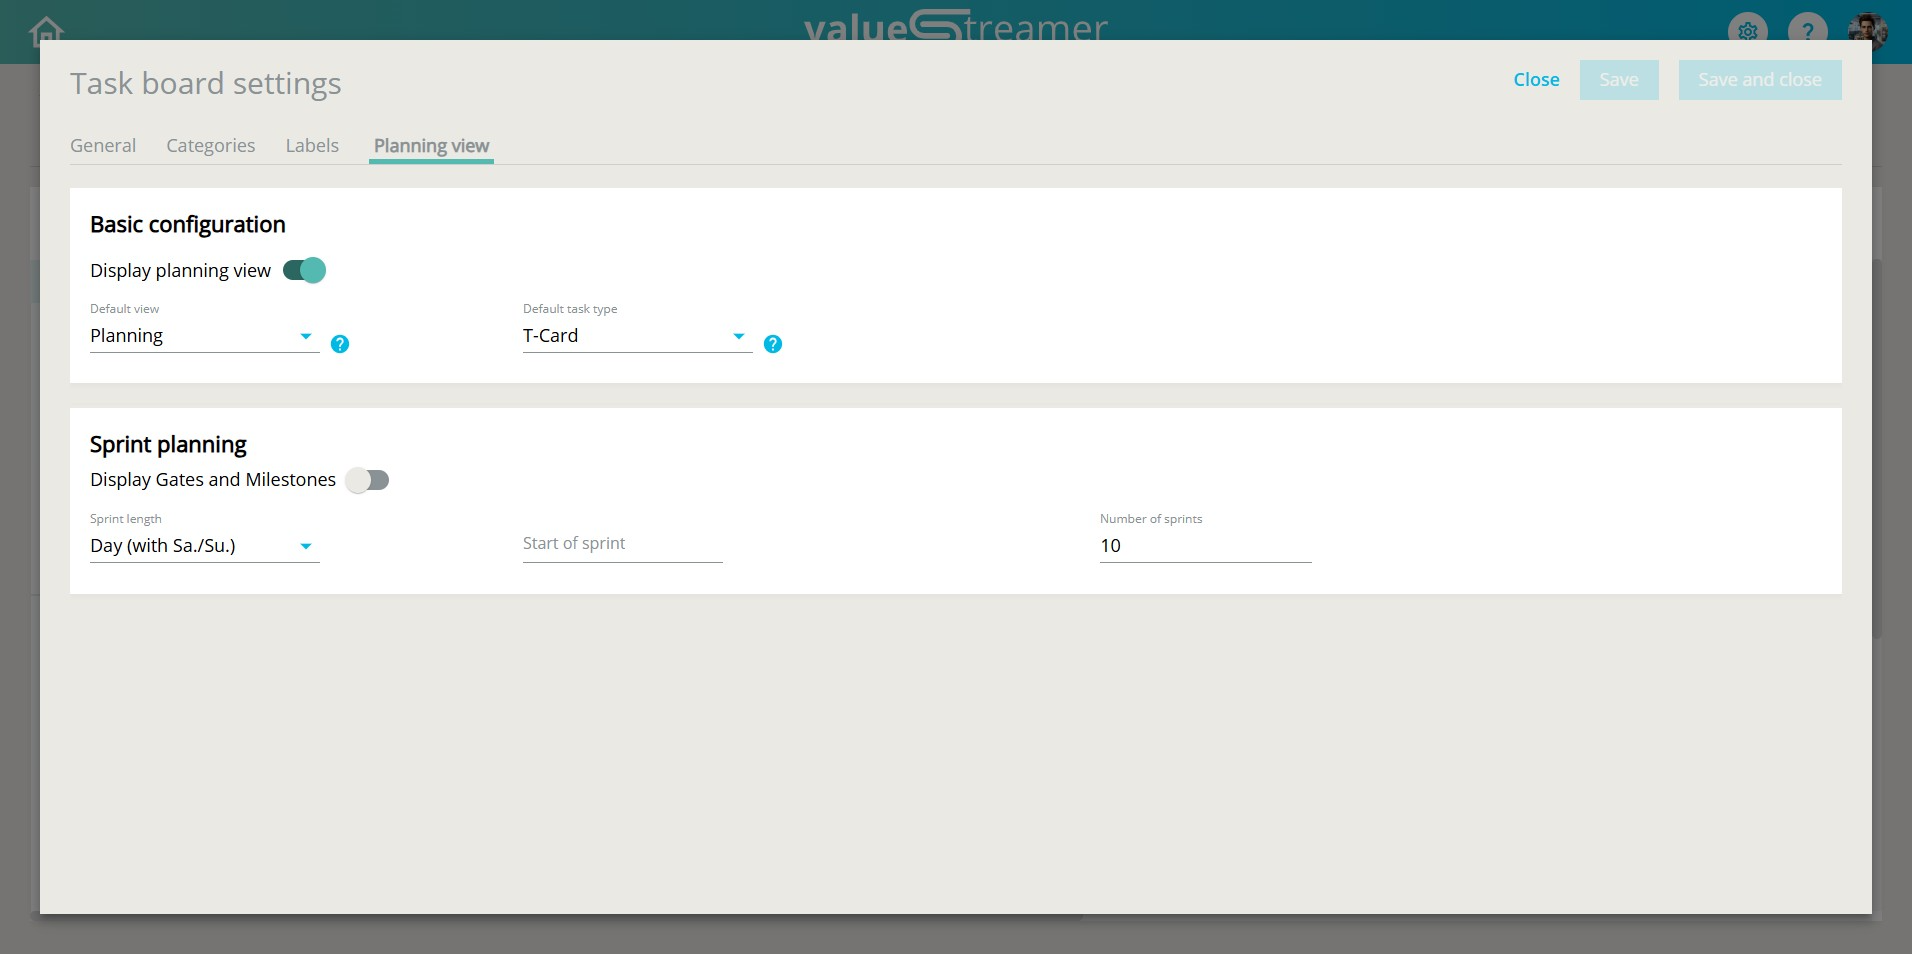
⚙️ Configure Base Settings
Standard View:
→ Choose between Planning, List or Delivery
Default Task Type:
→ Choose between Task or T‑Card
These settings determine what is selected by default when the board opens and when new tasks are created.
🗓️ Customize Takt Planning
Takt Length:
→ Choose Week or Day (with or without weekends)
Takt Start:
→ Define the starting day for the first takt
Number of Takts:
→ Determine how many takts (e.g., weeks) should be displayed in advance
Show Gates & Milestones:
→ Optionally toggle on for projects with fixed handover points
✅ T‑Card as the Preferred Task Type
T‑Cards are ideal for regular, recurring tasks such as rounds, audits, or cleanings.
T‑Cards automatically appear in the planning period with status indicators:
-
red = open
-
green = done
-
green with PDCA circle = done with deviation
Automatic re‑creation is supported for daily, weekly or monthly frequencies.
📎 For more on usage, see article: 🗂️ Managing T‑Card Tasks in the Planning View
✨ Tips & Best Practices
-
Set the number of takts generously (e.g., 10 weeks) for greater planning security
-
Use takt lengths without weekends if your team only operates on weekdays
-
T‑Cards are especially useful for visual process control following SFM logic
-
Changes in settings take effect immediately on the task board