🔍 Contents
- Why is this topic important?
- What is the Safety Cross?
- Color logic and meaning
- Recording and saving KPI values
- Status dialog in detail
- Input fields for incidents
- Additional information and admin configuration
- Creating deviations and actions
- Defining non-working days
- Tips & Best Practices
- FAQ
❓ Why is this topic important?
The KPI “Safety” creates transparency about safety-related incidents and helps teams detect risks early and initiate preventive measures.
ℹ️ Note: This KPI is predefined in the system, available in multiple languages, and can be used in all safety-relevant teams.
📅 What is the Safety Cross?
The safety cross displays the team’s safety status in a monthly calendar. At a glance, it shows:
-
On which days incidents were reported
-
How many accident-free days have been achieved in a row
📸 Screenshot: Safety cross with daily ratings
🎨 Color logic and meaning
| Color | Meaning |
|---|---|
| 🟥 Red | Accident reported |
| 🟨 Yellow | Near miss incident |
| 🟩 Green | Accident-free day |
| ⬜ Grey | Non-working day |
🛠️ Recording and saving KPI values
-
Click “Evaluate Safety” or select a date in the safety cross.
-
Choose one of the four evaluations:
-
🟩 Accident-free → can be saved directly
-
⬜ Non-working → can be saved directly
-
🟨 Near miss → additional inputs required
-
🟥 Accident → additional inputs required
-
-
Click Save.
📸 Screenshot: Evaluation dialog “Accident-free”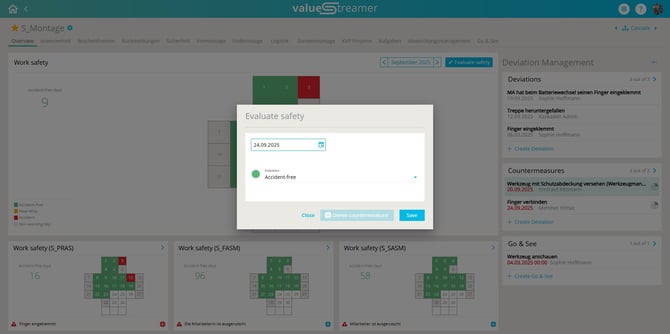
⚠️ Warning: For Yellow or Red, a description and selections in the configured fields (e.g., shift, body part, type of injury) are mandatory.
📸 Screenshot: Evaluation dialog “Accident” with mandatory fields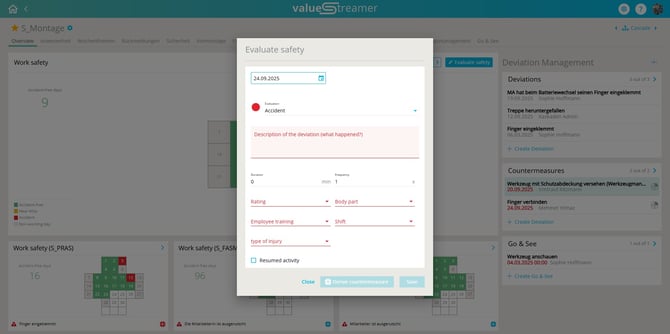
🖱️ Status dialog in detail
When clicking on a date, the status dialog opens:
-
Color-coded selection (Red, Yellow, Green)
-
Clear separation between date selection and evaluation
-
Indicator showing whether actions are already linked
📸 Screenshot: Safety status dialog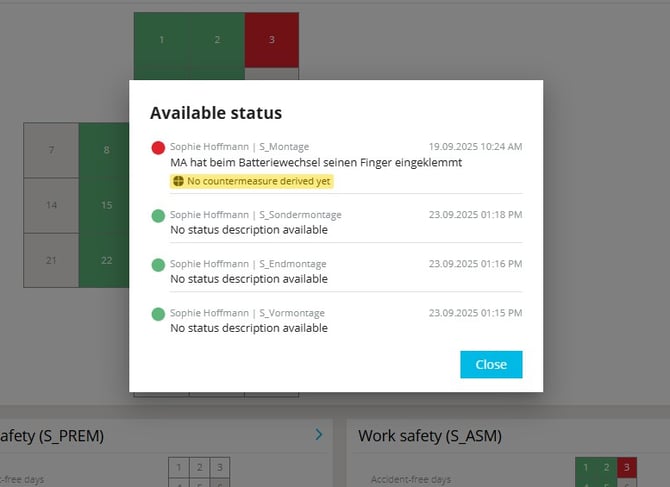
⚠️ Warning: The dialog has been completely redesigned.
📋 Input fields for incidents
For accidents and near misses, configurable fields appear, such as:
-
Description of the incident
-
Body part
-
Shift
-
Type of injury
-
Training provided
-
Activity resumed (checkbox)
🗂️ Additional information and admin configuration
Admins can add extra fields to enable detailed analysis:
-
Text fields for free input
-
Dropdowns for standardized choices (e.g., deviation type)
-
Checkboxes for additional attributes
These fields directly affect KPI aggregation.
⚠️ Warning: Only system administrators can configure these fields.
📸 Screenshot: Admin configuration mask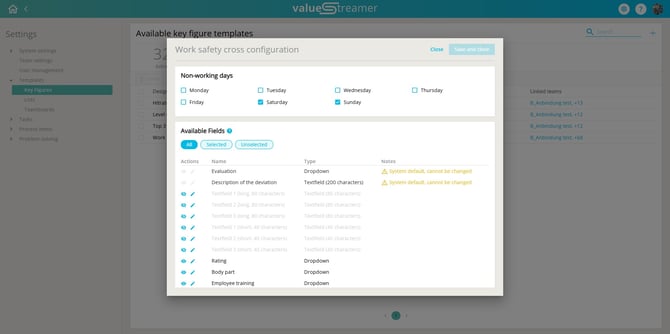
ℹ️ Note: In this section, admins can select from a predefined set of field types (text, dropdown, checkbox) to capture tenant-specific information required when recording a near miss or accident.
🧾 Creating deviations and actions
After recording an accident or near miss, the system automatically offers the option to create a deviation:
-
Title of the deviation = description of the incident
-
The deviation is shown in the “Deviation Management” module
-
Actions can be linked directly
✨ Tip: Create deviations and actions immediately when logging incidents to avoid information loss.
📆 Defining non-working days
In the admin area, non-working days (e.g., weekends, public holidays) can be defined. These will appear as ⬜ grey in the safety cross.
ℹ️ Note: Changes only apply to future days.
📸 Screenshot: Setting non-working days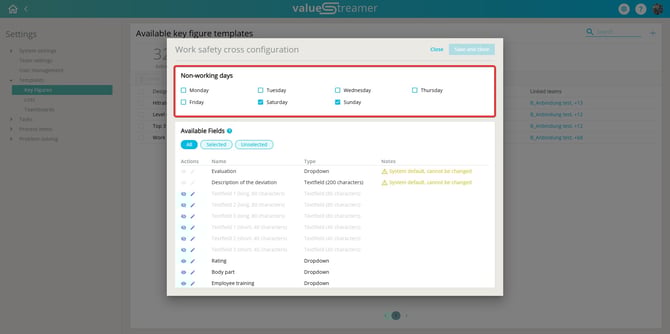
✨ Tips & Best Practices
-
Record incidents immediately after they occur.
-
Use the safety cross as a visual discussion tool in shopfloor meetings.
-
Always link incidents with concrete actions to close learning loops.
-
Regularly review dropdown values and configurations in the admin area.
❓ FAQ
Can I record accidents retroactively?
→ Yes, all calendar days can be edited retrospectively.
What happens if I don’t provide a description for an accident?
→ The entry cannot be saved – mandatory fields prevent this.
What happens to recorded deviations?
→ They automatically appear in the deviation management module and can be further processed there.